In the temperamental climate of Melbourne, Australia, where homes face everything from scorching summer heat to wind-driven rain, fascia boards and guttering systems are more than just aesthetic features—they’re critical components of your home’s defense against water damage. Steve Arnie of Gutter Cleaning Melbourne highlights that whether you’re dealing with rotting timber or prepping for a roofline upgrade, understanding how to remove a gutter to replace fascia is essential for a seamless renovation.
What Are Fascia Boards and Why Do They Matter?
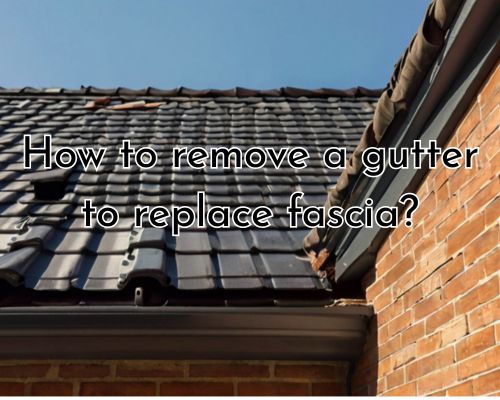
Fascia boards are the long, straight boards that run along the lower edge of the roof, just behind the gutters. Their primary role? Supporting the gutter system and protecting the roof cavity from weather and pests. In Melbourne’s often damp winters and unpredictable downpours, compromised fascia can lead to serious issues like mould growth, structural timber decay, and even insulation damage.
Signs Your Fascia Needs Replacing
Before grabbing a ladder and tools, it’s crucial to determine whether your fascia actually needs replacing. Here are key indicators:
- Flaking paint or visible water damage
- Sagging or detached gutters
- Pest infestations (common in Melbourne’s leafy suburbs like Kew and Surrey Hills)
- Soft or spongy wood when touched
If you’re seeing these signs, your fascia has likely suffered from prolonged exposure to moisture—common in areas like Outer Eastern Melbourne, which experience high rainfall.
Tools & Materials Needed
Before you remove any gutters, prep your workspace. You’ll need:
- Ladder or scaffolding (Melbourne council regulations require safe height practices)
- Safety gloves and goggles
- Cordless drill or screwdriver
- Pry bar
- Hammer
- Drop cloth or tarp
- Replacement fascia boards (typically treated pine or HardieFlex® in Australia)
- Galvanised nails or screws
- Gutter sealant and brackets for reattachment
💡 Pro Tip: If you’re located near salt-heavy air zones like St Kilda or Port Melbourne, opt for marine-grade stainless steel fasteners to prevent corrosion.
Step-by-Step: How to Remove a Gutter to Replace Fascia
Step 1: Safety First
In Melbourne, DIY gutter work must comply with WorkSafe Victoria standards. If you’re working above 2 metres, you may need fall protection. Always check with local council guidelines, especially in municipalities like City of Melbourne or Banyule.
Step 2: Clear the Gutters
Remove any debris, leaves, and sludge from the gutters. This reduces the weight and mess during removal. Given Melbourne’s tree-heavy regions like Eltham and Doncaster, blocked gutters are a common culprit in fascia deterioration.
Step 3: Detach Downpipes
Use a screwdriver to detach the downpipes from the gutter system. Temporarily cap the bottom end with duct tape or a rag to prevent water drips.
Step 4: Unscrew or Pry Off Gutter Brackets
Starting at one end, carefully unscrew or pry off the gutter brackets from the fascia. Support the length of the gutter as you work—gutters can bend or collapse if mishandled.
If your home has Colorbond® gutters, which are common in newer Melbourne builds, handle them with care to avoid creasing the metal.
Step 5: Remove the Gutter
Once detached, lower the gutter gently to the ground. This is where an extra pair of hands comes in handy. Lay it on a drop cloth for cleaning or reinstallation.
Step 6: Inspect and Remove the Fascia
Check the fascia board for rot, mould, and nail damage. Use a pry bar to carefully detach it from the rafter ends. If your house has a timber-framed roof, be cautious not to damage the rafters during removal.
Step 7: Install New Fascia
Cut the new board to match the removed section. Fasten it with galvanised screws or nails into the rafter ends. Paint or seal the fascia to protect against moisture—this is especially vital in Melbourne’s coastal or bushland areas.
Step 8: Reinstall Guttering
Clean and inspect your old guttering (or replace if needed). Reattach it to the new fascia using brackets and sealant. Make sure the gutter slope is maintained to allow proper water drainage—aim for a fall of 1:500, as recommended in Australian Standards AS/NZS 3500.
Local Insight: When to Call a Professional in Melbourne
While many Melbourne homeowners tackle this as a DIY job, it’s worth calling in a licensed professional if:
- The gutter system is integrated with box gutters or parapet roofs
- You’re unfamiliar with working at heights
- The fascia or rafters show signs of structural damage
Several local specialists in fascia and gutter replacement operate in Melbourne suburbs like Balwyn, Footscray, and Glen Waverley. Ensure they’re registered with the Victorian Building Authority (VBA) and offer a workmanship guarantee. For professional needs, just go to https://gutter-cleaning-melbourne.com.au/.
Environmental Considerations
If your home is within a Melbourne Bushfire Management Overlay (BMO) area (e.g., parts of Hurstbridge or Warrandyte), your fascia and gutter materials must comply with BAL (Bushfire Attack Level) ratings. Using metal fascia and ember-proof gutter guards is often mandated.
Additionally, consider installing rainwater tanks or gutter guards to make your roofline more efficient and sustainable—this aligns with Melbourne’s growing push for green building standards and stormwater management.
Conclusion: A Smart Move for Your Melbourne Home
Knowing how to remove a gutter to replace fascia is more than a handyman hack—it’s a proactive way to protect your Melbourne home from weather, pests, and water damage. From the charming cottages in Carlton North to the heritage homes of Williamstown, gutter and fascia health should never be ignored.
Whether you DIY or hire local experts, staying ahead of maintenance ensures your home remains both structurally sound and visually appealing. And let’s be honest—nothing says “Melbourne savvy homeowner” like a perfectly aligned fascia and debris-free gutter, right?