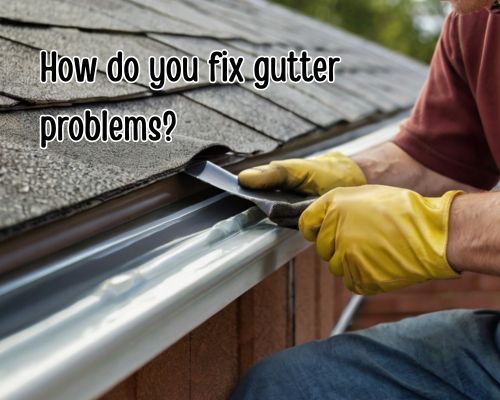
Introduction: Why Gutter Problems in Melbourne Can’t Be Ignored
Gutters are a home’s unsung heroes—quietly diverting rainwater, protecting your roof, foundation, and landscaping. But when they fail, the consequences can be expensive and damaging. If you’ve ever asked, “How do you fix gutter problems?” you’re not alone—especially in a climate like Melbourne, Australia, where unpredictable weather can expose weak gutter systems fast. This guide dives into the most common gutter issues homeowners face in Melbourne, how to fix them efficiently, and when it’s time to call in a professional.
1. Common Gutter Problems in Melbourne Homes
Understanding the issue is the first step to fixing it. Here are the most frequent gutter problems Melbourne homeowners encounter:
- Clogged gutters: Often due to leaf debris from eucalyptus and other native trees.
- Sagging or detached gutters: Caused by excessive water weight or corroded fasteners.
- Leaking joints and seams: A result of aging sealant or physical damage.
- Improper slope: Prevents water from draining efficiently, causing stagnation.
- Rust and corrosion: Particularly common in older steel gutters exposed to Melbourne’s coastal air.
These issues are not only structural but also environmental. The seasonal rainfalls in Victoria, especially during autumn and spring, amplify even minor gutter malfunctions. You may also see gutter services for your needs.
2. How to Fix Gutter Problems (DIY Solutions)
A. Clearing Blockages
Blocked gutters are the easiest to fix but also the most frequent issue. Use a gutter scoop or garden trowel to remove debris, followed by a hose flush to ensure proper water flow. Installing gutter guards can prevent future blockages—a smart investment for Melbourne homes surrounded by trees.
B. Resealing Leaky Joints
Use silicone-based gutter sealant to fix small leaks. Clean the area thoroughly, ensure it’s dry, and apply a generous bead of sealant along the seam or joint. This is a quick fix that can extend the life of your gutters.
C. Fixing Sagging Gutters
Sagging often results from loose hangers. Replace or tighten the screws. For long-term support, consider switching to hidden hangers, which provide more strength and a cleaner look. This is particularly useful in inner Melbourne suburbs where aesthetics matter.
D. Correcting Slope Issues
Gutters should slope 6mm for every 3 metres towards the downspout. Use a level to check for alignment, and rehang the gutter brackets if needed. It’s time-consuming but crucial to avoid water pooling.
E. Removing Rust and Repainting
Use a wire brush or sandpaper to scrub off rust. Apply a rust-inhibitive primer and exterior metal paint. In bayside areas like Brighton or St Kilda, this helps combat the salt-laden air’s corrosive effects.
3. When to Call the Pros: Gutter Repair Services in Melbourne
Not all gutter issues are DIY-friendly. If your gutters show signs of:
- Separation from the fascia
- Water damage on internal walls or ceilings
- Mould and mildew around foundations
- Multiple persistent leaks despite sealing
…then it’s time to hire a licensed roof plumber or gutter repair specialist in Melbourne. These professionals can provide a comprehensive inspection using drone assessments, thermal imaging, or even gutter camera systems. Look for gutter services in suburbs like Toorak, Camberwell, and Glen Waverley—areas where historic homes often require specialised repairs.
4. The Importance of Gutter Maintenance in Melbourne’s Climate
Melbourne’s weather is notoriously variable—sunny mornings often give way to sudden downpours. This climatic quirk makes regular gutter maintenance a necessity, not a luxury. Key maintenance tips include:
- Biannual cleaning: Especially after autumn leaf fall and spring storms.
- Annual inspections: Preferably before winter to catch vulnerabilities.
- Trimming trees near gutters: To reduce leaf litter.
- Installing downpipe filters: To prevent underground pipe blockages.
These preventative measures are especially critical in older Melbourne neighbourhoods like Fitzroy, Carlton, and South Yarra, where gutter systems may not have been updated in decades.
5. Choosing the Right Gutter System: A Preventative Strategy
While fixing problems is important, preventing them is even smarter. Many Melbourne homeowners are switching to aluminium and Colorbond gutters for durability and corrosion resistance. Features to consider:
- Seamless gutter systems: Reduce leak points.
- Box gutters: Common in modern and commercial buildings, but must be maintained regularly.
- Round vs. square profiles: Round is easier to clean; square has better water capacity.
When building or renovating in Melbourne’s rapidly developing outer suburbs like Point Cook or Berwick, investing in an optimized gutter system saves long-term maintenance costs.
6. Local Considerations: Council Regulations and Environmental Impact
In Melbourne, gutter work—especially on heritage properties—may require permits. Councils like City of Yarra or Boroondara have strict guidelines for exterior modifications.
Additionally, sustainable water management is a growing concern. Many households are integrating gutter-connected rainwater harvesting systems, especially in environmentally conscious areas like Northcote and Brunswick. This reduces strain on stormwater systems and saves water for gardens.
7. Final Thoughts: Don’t Wait Until It’s a Flood
Waiting too long to address gutter issues is a costly gamble. By understanding how to fix gutter problems, performing regular maintenance, and knowing when to seek expert help, you safeguard your home and boost its value.
For Melbourne homeowners, where sudden weather shifts and leafy neighbourhoods create the perfect storm for gutter troubles, this knowledge is more than just practical—it’s essential.
Call to Action:
🌧️ Is your Melbourne home gutter-ready for the next storm? Don’t wait for water damage to find out. Whether it’s a DIY fix or a professional upgrade, addressing gutter problems today can save you thousands tomorrow. Contact a trusted Melbourne gutter repair expert now, or start with a full inspection!
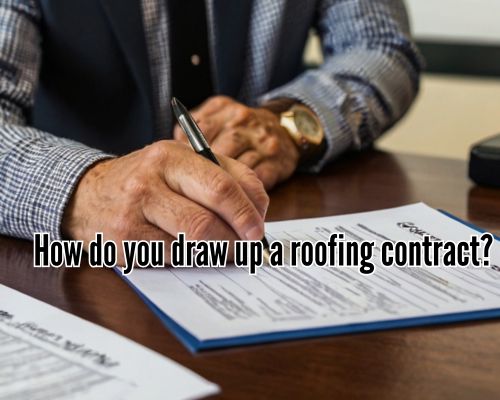
When it comes to roofing projects in New Jersey, whether you’re repairing storm damage in Bergen County or installing a new roof in Princeton, having a well-drawn roofing contract is your first line of defense against costly disputes. But how do you draw up a roofing contract that’s legally sound, clear, and tailored to New Jersey’s unique building codes and climate challenges?
With Charles Jimerson of CJ Commercial Roofing NJ, we’ll walk you through everything from the essential contract elements to key legal considerations specific to New Jersey roofing projects—so you can safeguard your investment and ensure a smooth project from start to finish.
Why a Roofing Contract Matters in New Jersey
Before jumping into the “how,” let’s understand the “why.” New Jersey’s climate throws everything from snow to hurricanes at your roof, which means roofing work isn’t just cosmetic—it’s crucial for your home’s safety and energy efficiency.
A roofing contract acts as the blueprint for your project’s success. It protects both the homeowner and the contractor by clearly defining:
- Project scope and materials
- Timelines and deadlines
- Payment schedules
- Warranties and guarantees
- Permits and inspections
- Liability and insurance coverage
Without a detailed roofing contract, New Jersey homeowners risk miscommunication, delays, and unexpected costs. Trust us, you want everything spelled out before that first shingle is nailed.
Step 1: Gather Essential Information
Start by collecting all the details you’ll need. This includes:
- Full legal names and contact information of both parties (homeowner and roofing contractor)
- Physical address of the property in New Jersey (e.g., Newark, Jersey City, Morristown)
- Description of the roofing project (repair, replacement, new installation)
- Type of roofing materials to be used (asphalt shingles, metal roofing, slate, etc.)
Tip: Roofing materials affect not just the look but also local compliance. For example, certain materials may be favored or restricted in coastal New Jersey towns like Cape May due to hurricane codes.
Step 2: Define the Scope of Work Clearly
A vague contract is a lawsuit waiting to happen. Your contract should clearly describe:
- What exactly the contractor will do (tear-off existing roof, replace flashing, install gutters)
- The brands, types, and quality of materials to be used
- Project milestones and expected completion dates
- Any additional work that might arise (e.g., repairing rotted wood discovered mid-project)
In New Jersey, where building codes can vary between counties—think Essex vs. Sussex—it’s smart to reference compliance with New Jersey’s Uniform Construction Code (UCC) in your contract. This shows you’re serious about legality and safety.
Step 3: Payment Terms and Schedule
Money talks, and in roofing contracts, it must be crystal clear:
- Total project cost with itemized details (materials, labor, permits)
- Payment schedule (e.g., 30% upfront, 50% midway, 20% upon completion)
- Accepted payment methods
- Terms on late payments or change orders
For New Jersey projects, keep in mind state regulations about contractor liens. If the contractor doesn’t get paid, they can place a lien on your property, complicating your title. Proper payment schedules can prevent disputes and protect your investment.
Step 4: Insurance, Licenses, and Permits
Your roofing contractor should be licensed by the New Jersey Division of Consumer Affairs and carry insurance that covers workers’ compensation and liability. Your contract should explicitly require:
- Proof of contractor license and insurance before work begins
- Contractor responsibility for obtaining all necessary permits from local municipalities (e.g., Hoboken Building Department, Camden Code Enforcement)
- Homeowner’s right to verify permit status and inspections
This step is crucial in New Jersey where permits and inspections are mandatory for most roofing projects to ensure compliance and safety.
Step 5: Warranties and Guarantees
You deserve peace of mind, so a roofing contract should specify warranties on:
- Workmanship (how long the contractor guarantees their labor)
- Materials (manufacturer’s warranty for shingles, metal, etc.)
- Any manufacturer certifications (e.g., CertainTeed, GAF)
In New Jersey’s harsh winters and humid summers, roofing warranties can save you thousands in repairs. Make sure your contract spells out warranty transferability if you sell your home.
Step 6: Handling Disputes and Termination Clauses
No one plans for conflicts, but your contract should prepare for them. Include:
- Dispute resolution methods (mediation, arbitration, or court)
- Grounds for contract termination by either party
- Procedures for handling unforeseen conditions (e.g., hidden structural damage)
- Liability limits and indemnity clauses
New Jersey courts tend to favor clear, written agreements in contractor disputes, so ironclad language here can save your bacon.
Step 7: Signatures and Date
Once everything is reviewed and agreed upon, both homeowner and contractor must sign and date the contract. For extra protection, consider:
- Having the contract notarized
- Keeping multiple copies—one for each party and a digital backup
Bonus Tips for New Jersey Roofing Contracts
- Local References: Check your contractor’s work in your county or city (e.g., Atlantic City or Princeton) and ask for references or reviews.
- Environmental Compliance: If you live near protected wetlands or shorelines (like the Jersey Shore), ensure the roofing materials and methods comply with local environmental regulations.
- Seasonal Considerations: New Jersey’s roofing work slows down in winter. Contracts should include clauses about weather delays or project suspensions.
Common Mistakes to Avoid
- Skipping Written Contracts: Verbal agreements won’t hold up in court.
- Vague Scope Descriptions: Don’t let “roof repair” be the only detail—get specifics.
- Ignoring Permits: Not obtaining permits can lead to fines and forced removal.
- Overlooking Payment Terms: Avoid paying 100% upfront or making last-minute changes without updating the contract.
- Neglecting Warranties: Always insist on written warranty details.
Conclusion: Protect Your New Jersey Roof with a Solid Contract
Drawing up a roofing contract in New Jersey is more than paperwork—it’s your project’s foundation. From detailed scopes and payment terms to insurance and warranties, a strong contract reduces risks and boosts confidence.
Whether you’re in bustling Paterson, historic Princeton, or shore-side Cape May, use this step-by-step guide to craft a roofing contract that meets local codes and protects your home investment.
Want to get started? Consult a local roofing expert or attorney to review your contract—because when it comes to roofs, it’s better to be safe than soggy.
Local Resources for New Jersey Homeowners
- New Jersey Division of Consumer Affairs: www.njconsumeraffairs.gov
- New Jersey Uniform Construction Code: www.nj.gov/dca/divisions/codes
- County Building Departments: Search for your specific county (e.g., Essex, Hudson) for permit information.
- Better Business Bureau – New Jersey: Check contractor reviews before signing.